...
Creating a “Custom Widget” under Settings → “Custom Widget” follows exactly the same process described below. The difference is that under Settings → “Custom Widget”, you will see a list of created Custom Widgets, and you can edit or delete them from there (read more about that here).
...
Creating a Custom Widget under My Dashboards:
- Attribute:
To create a custom attribute chart, click on Custom Widget on the left side.- Select “Create” and set the type to Attribute.
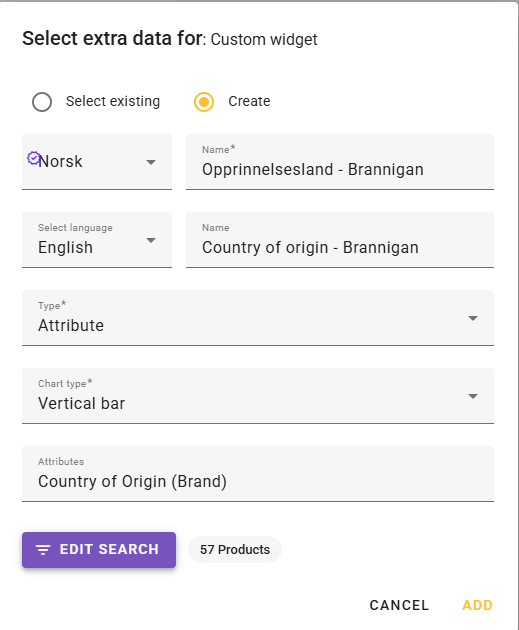
- Note: Only feed data register and Universal Text are available in the attribute list.
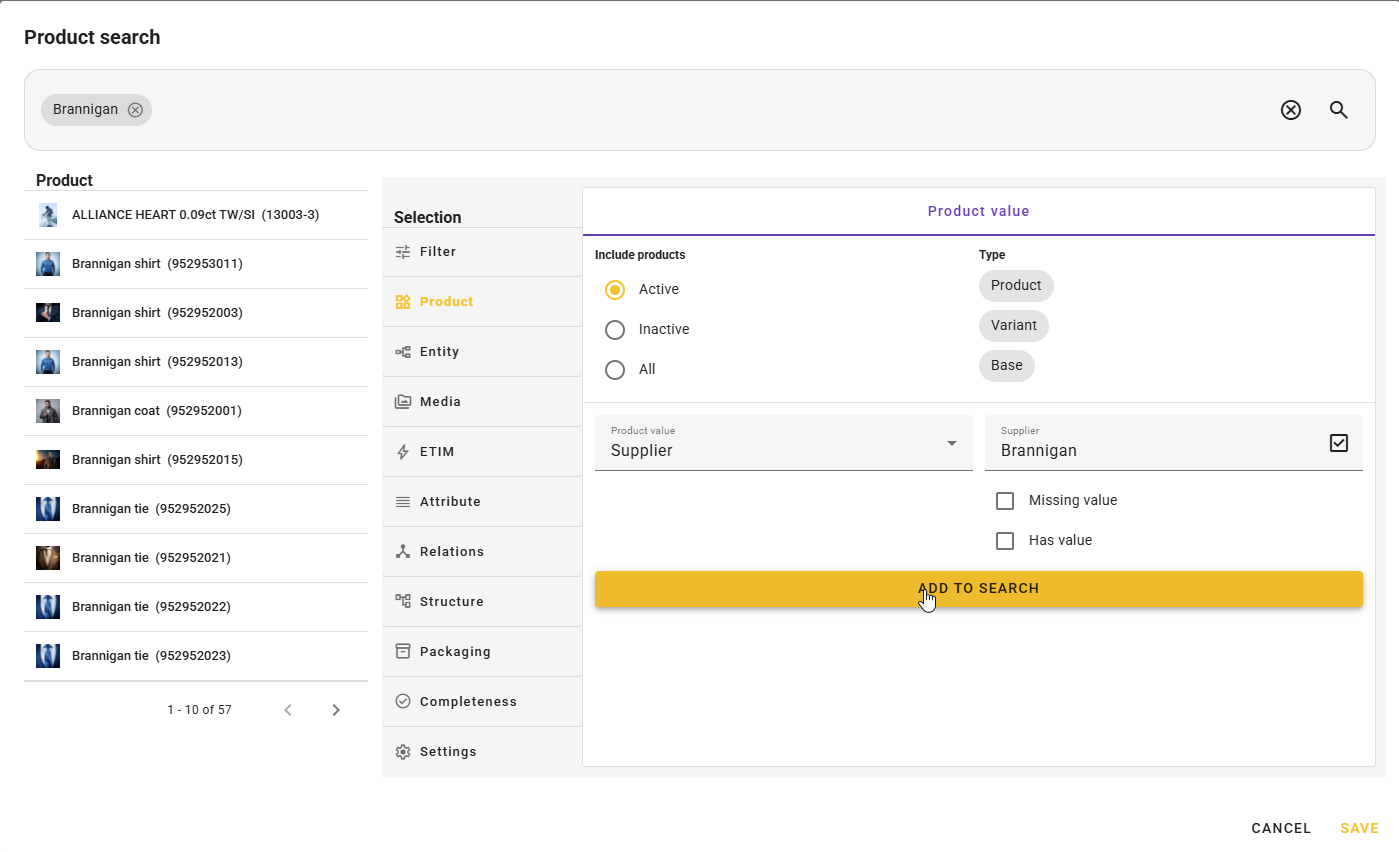
- If you do not want to include all active products for the selected attribute, you can filter products by clicking “Edit search”.
- Click “Add” to place it on the dashboard.
- Adjust size and placement if desired.
Example of a dashboard attribute element:
- Select “Create” and set the type to Attribute.
- Completeness (completion rate):
To create a dashboard chart for Completeness (completion rate), there are 3 steps required before it can be added to the dashboard:- Create Completeness (completion rate). Read more here.
- Create a Custom Widget under Settings → Custom Widget (located under the My Feed column). Read more here.
- Edit or create a Dashboard under Settings → My Dashboards (located under the My Feed column).
- Click on Custom Widget on the left side and select an existing one.
- The options shown in the “Select custom widget” field are only a list of completeness widgets created by following the first two steps above.
Example of a dashboard completion element:
...