Custom Widget (for dashboard charts)
There are 2 types of “Custom Widgets” that can be created on the dashboard:
Attribute
Completeness (Completion rate)
When you click on Custom Widget while in Settings → “My Dashboards”, a window appears where you can choose an existing configuration or create a new one.
Existing configurations are setups based on Attribute or Completeness (completion rate) that you have previously created. You can then choose from a list of existing custom widgets.

If you want to create a new Custom Widget, you can choose to create it directly from this window.
You can create a Custom Widget for Attributes directly under My Dashboards, or under Settings → Custom Widget.
Creating a “Custom Widget” under Settings → “Custom Widget” follows exactly the same process described below. The difference is that under Settings → “Custom Widget”, you will see a list of created Custom Widgets, and you can edit or delete them from there (read more about that here).
Creating a Custom Widget under My Dashboards:
- Attribute:
To create a custom attribute chart, click on Custom Widget on the left side.- Select “Create” and set the type to Attribute.
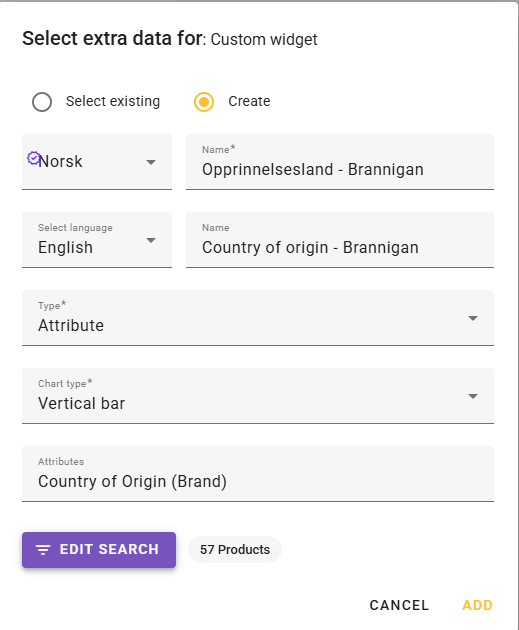
- Note: Only feed data register and Universal Text are available in the attribute list.
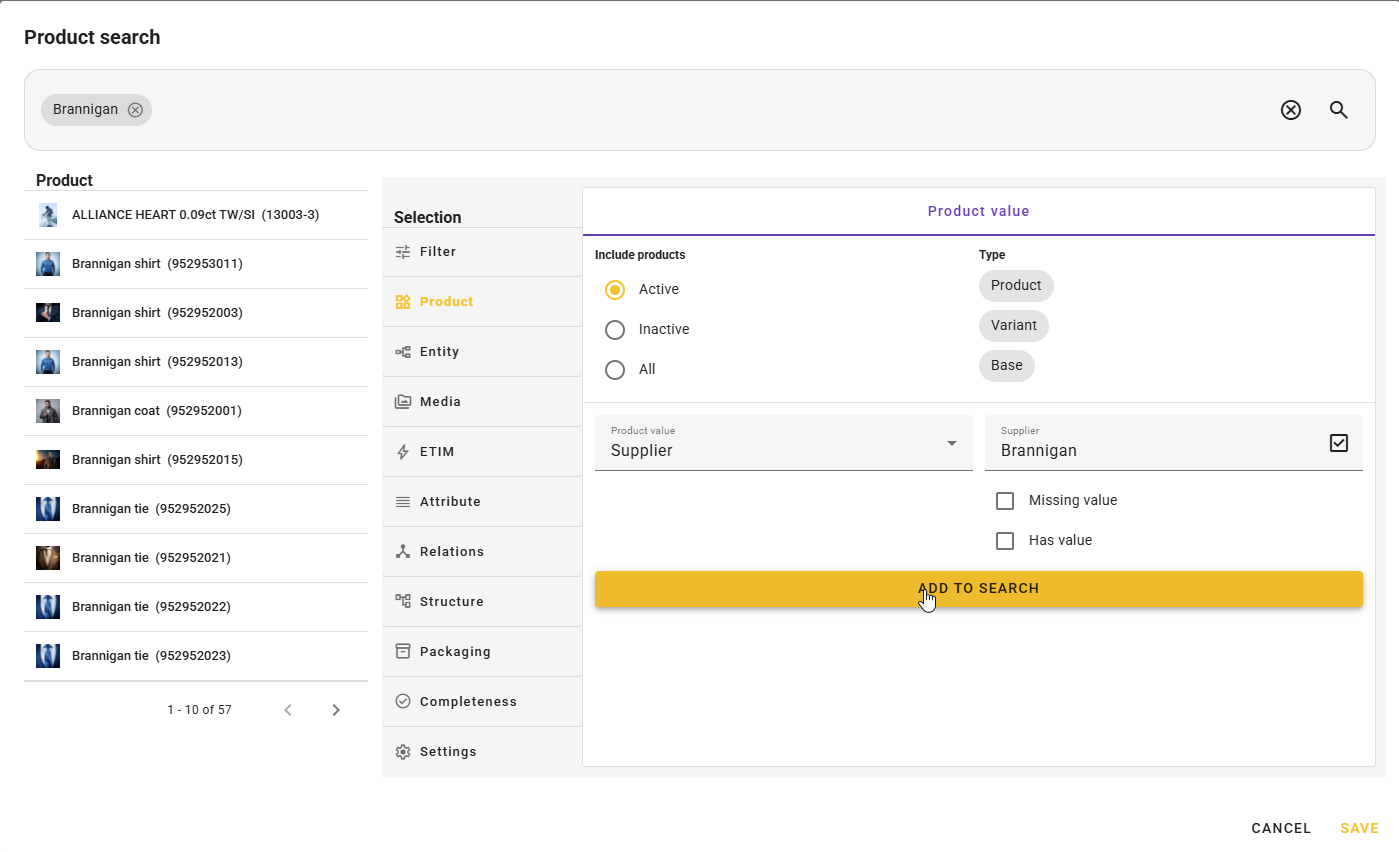
- If you do not want to include all active products for the selected attribute, you can filter products by clicking “Edit search”.
- Click “Add” to place it on the dashboard.
- Adjust size and placement if desired.
Example of a dashboard attribute element:
- Select “Create” and set the type to Attribute.
- Completeness (completion rate):
To create a dashboard chart for Completeness (completion rate), there are 3 steps required before it can be added to the dashboard:- Create Completeness (completion rate). Read more here.
- Create a Custom Widget under Settings → Custom Widget (located under the My Feed column). Read more here.
- Edit or create a Dashboard under Settings → My Dashboards (located under the My Feed column).
- Click on Custom Widget on the left side and select an existing one.
- The options shown in the “Select custom widget” field are only a list of completeness widgets created by following the first two steps above.
Example of a dashboard completion element:
When you go to the dashboard and click on one of the columns, a selection of products will be shown based on the percentage you clicked on, but not necessarily the attributes you defined as criteria.
Click the context menu in the top right corner and select “Change columns”.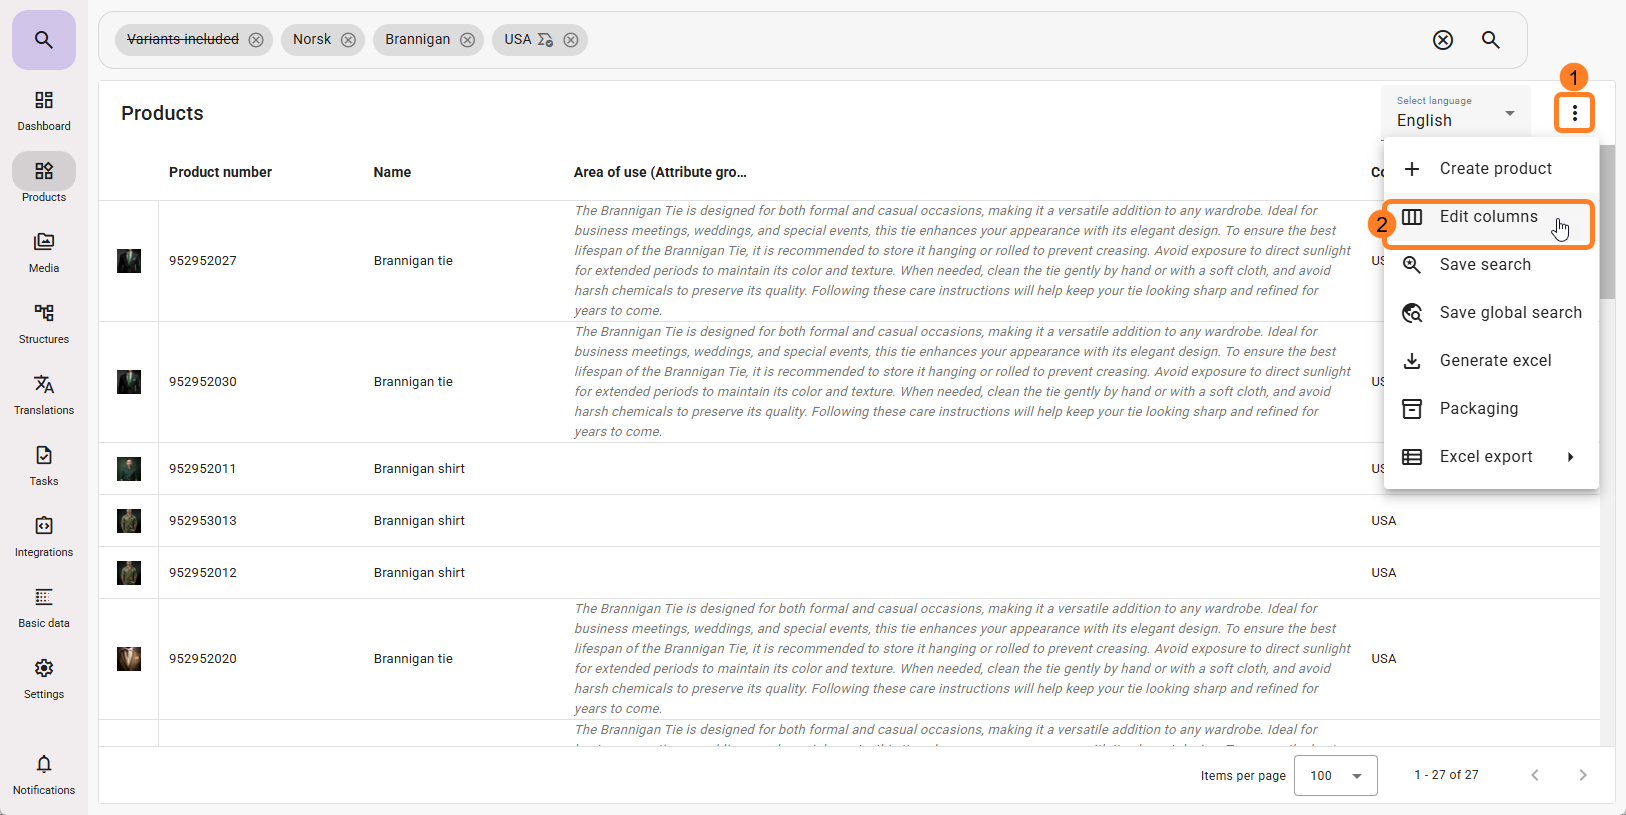
Select the attributes you want to display (based on the completion rule you created).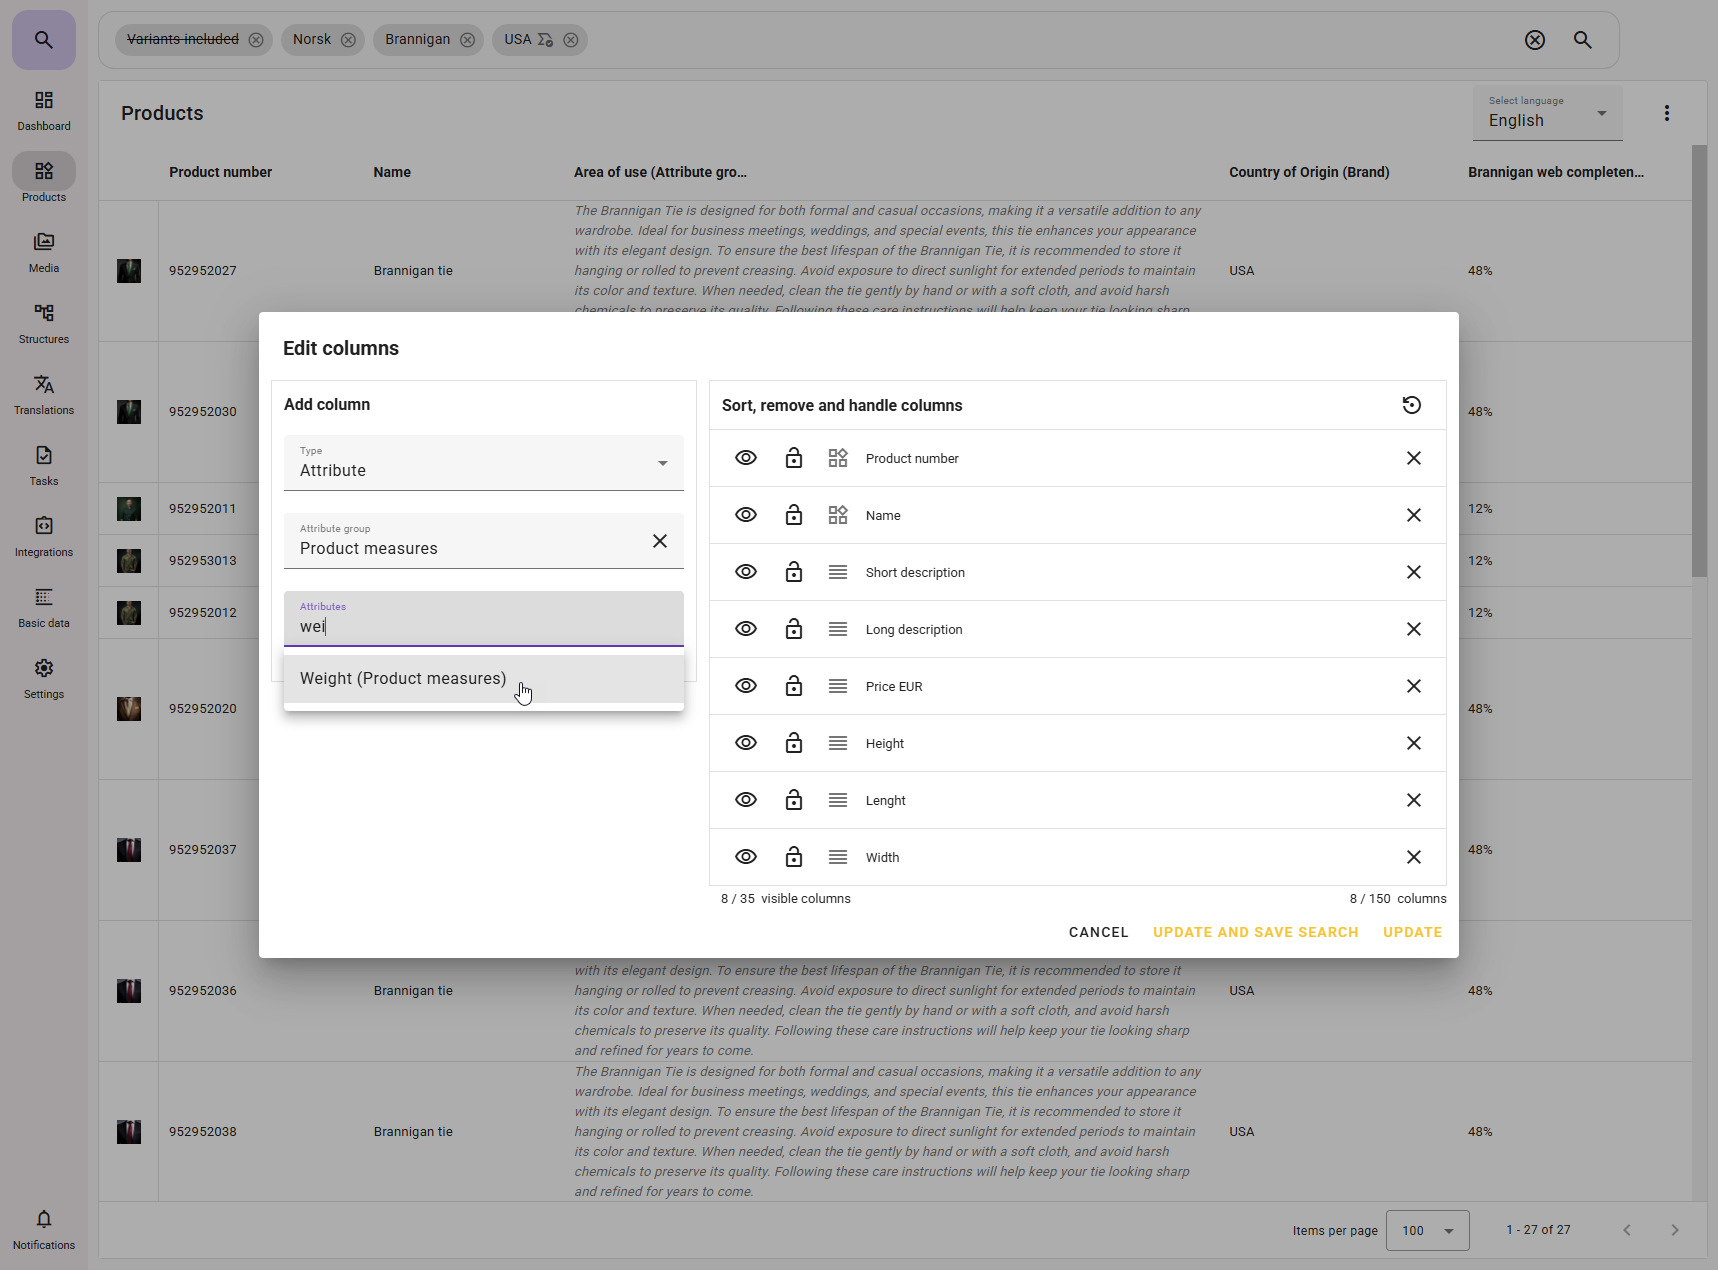
You can also choose “Completeness (completion rate)” in the type dropdown. This will display the completion level of the product.
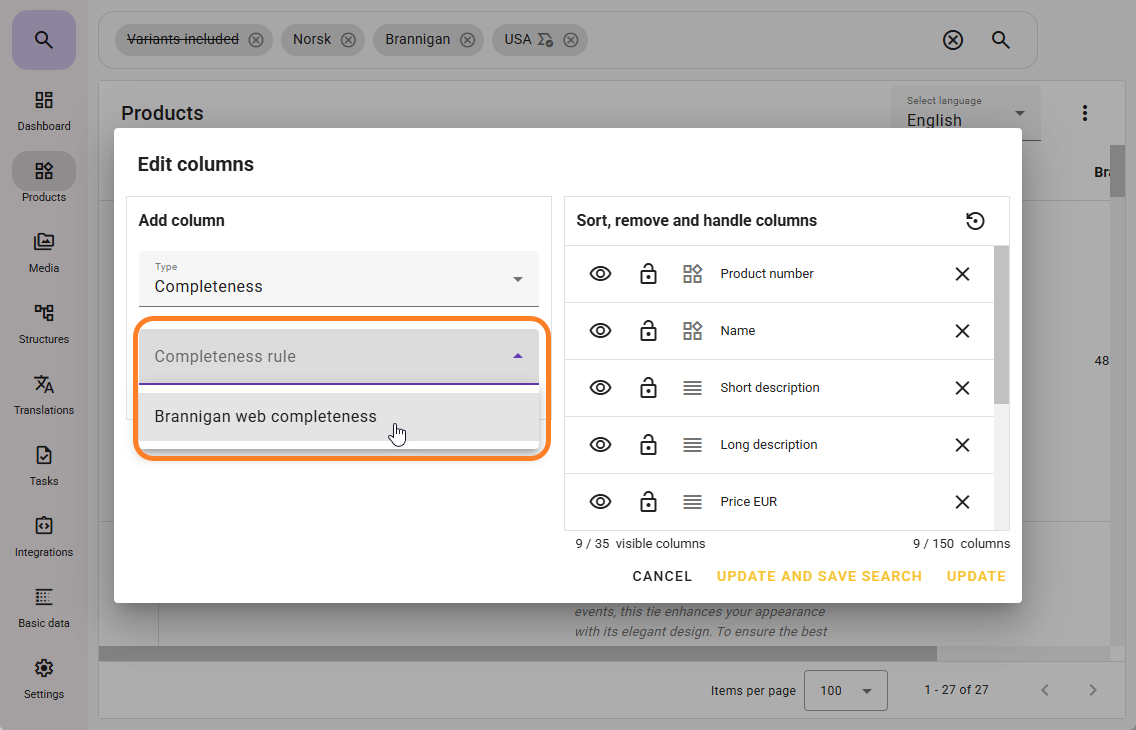
If you select completion rate, you must specify which completion rule you want to display.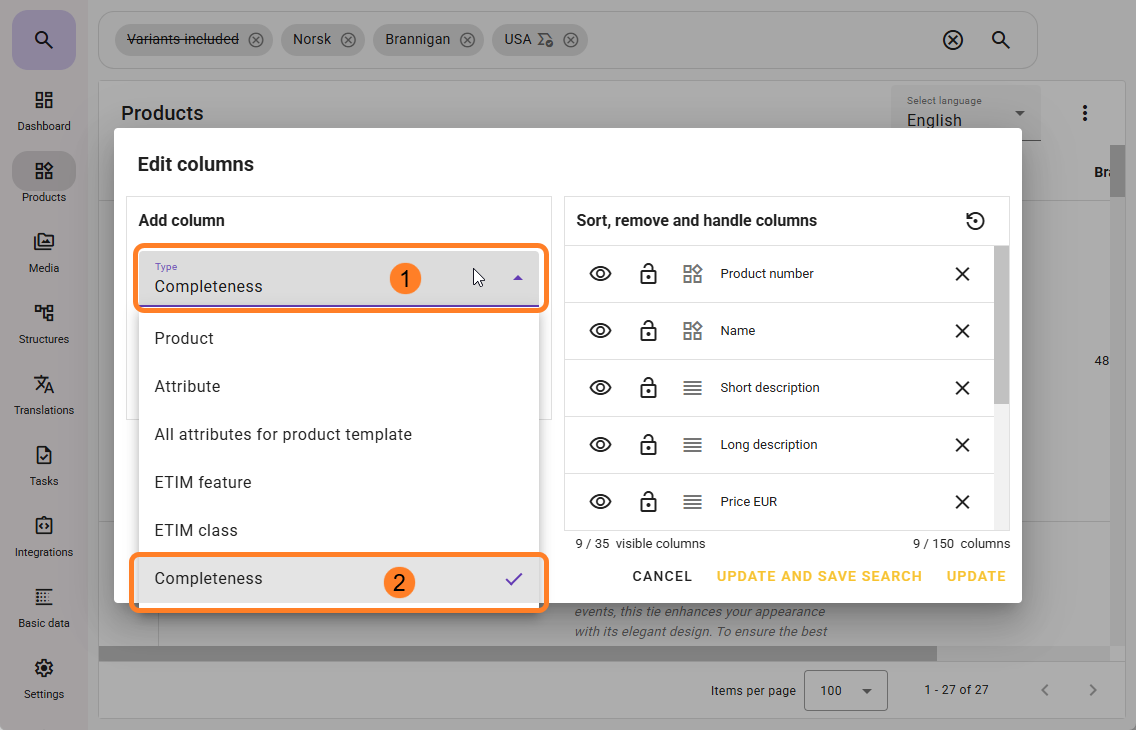
When you click on the dashboard widget after customizing the view, the search results may look like this:
From here, you can see the completion rate (but not full details of what is missing). You can edit attributes using bulk updates, or export to Excel and edit fields for Excel import.
Media roles must be set directly on the product in the feed.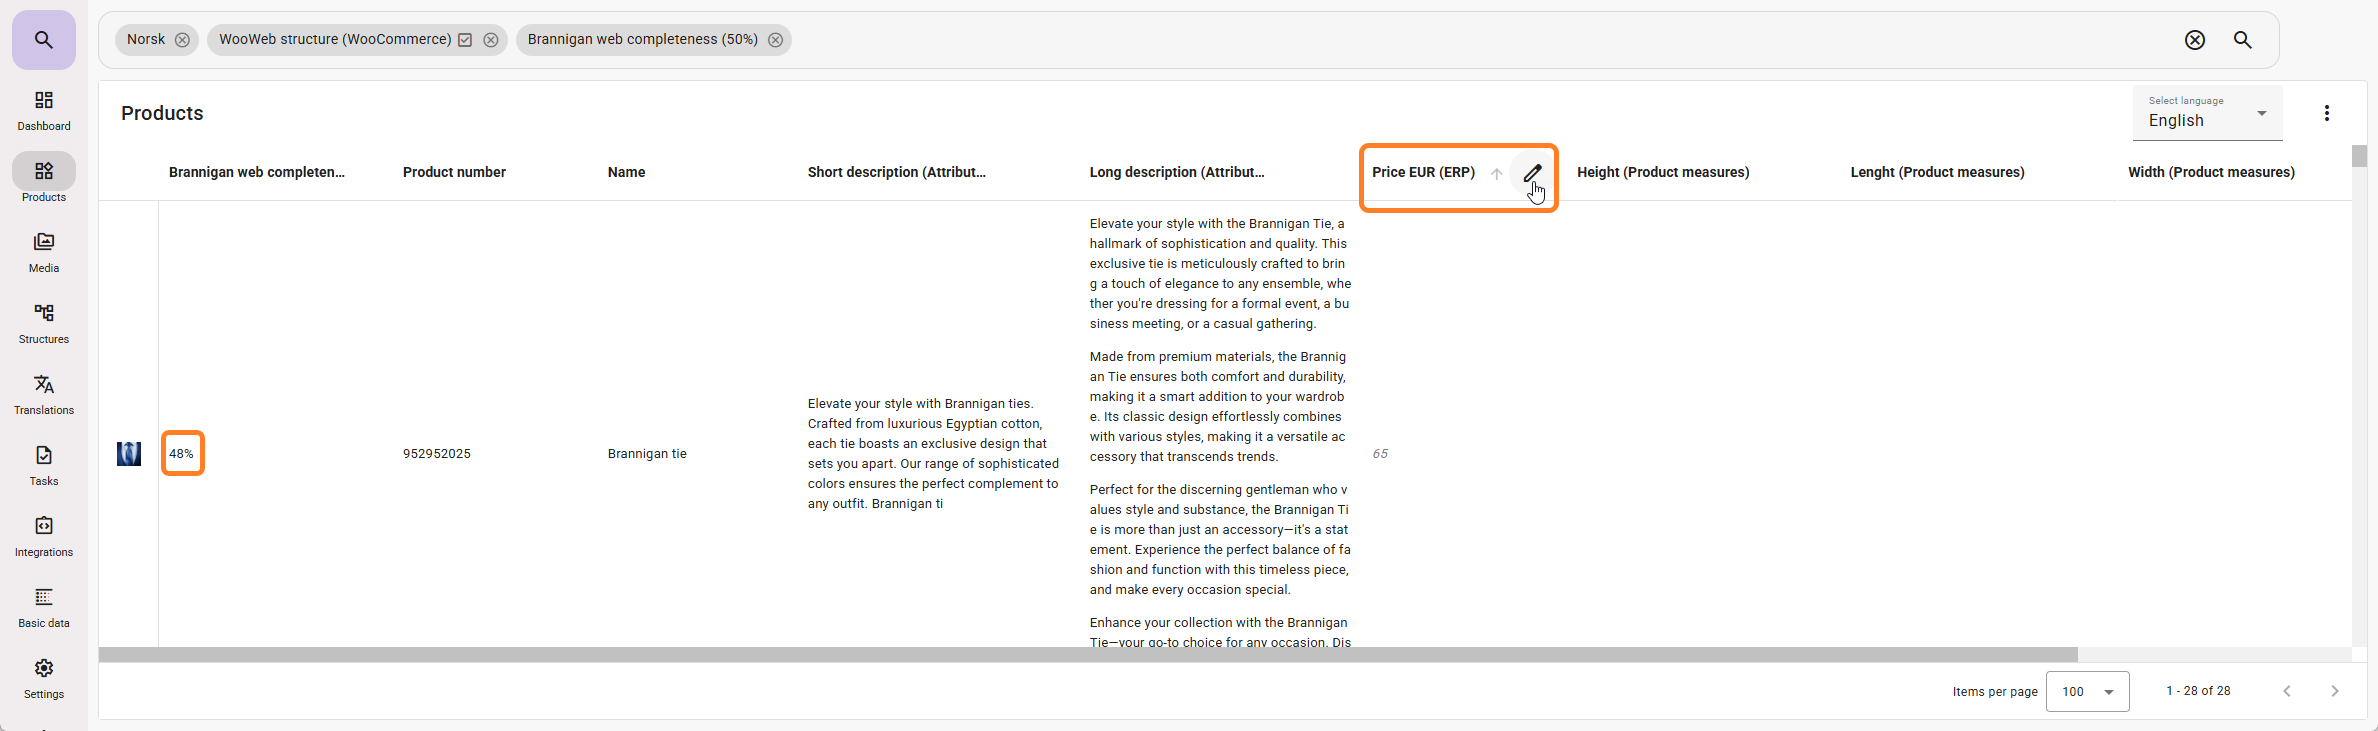
If you click on one of the products in the list, the completion rate will appear at the top of the product.
Clicking it and selecting a completion rule will open an information window showing what is missing.
When you add the missing data to the product, the completion rate updates dynamically.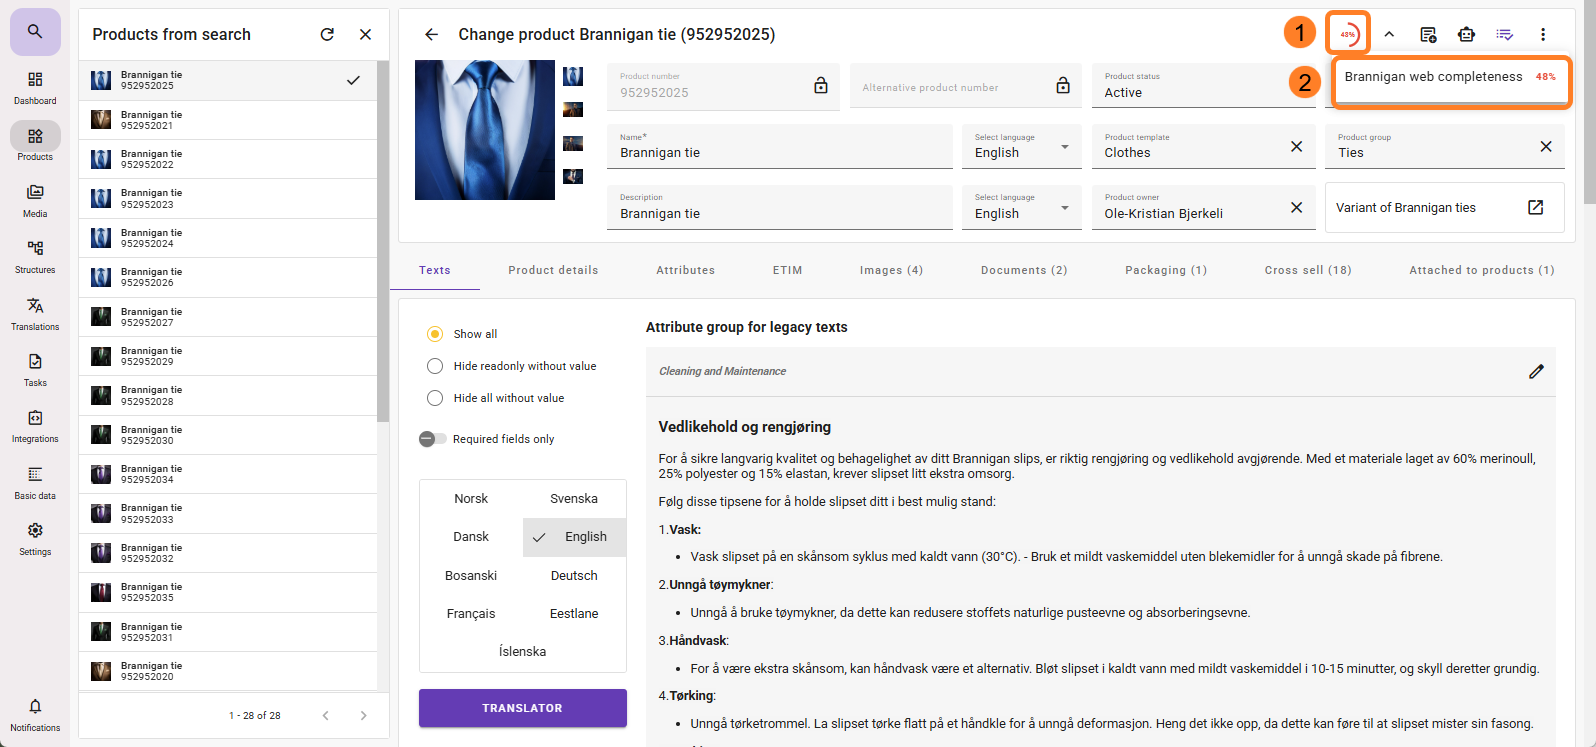

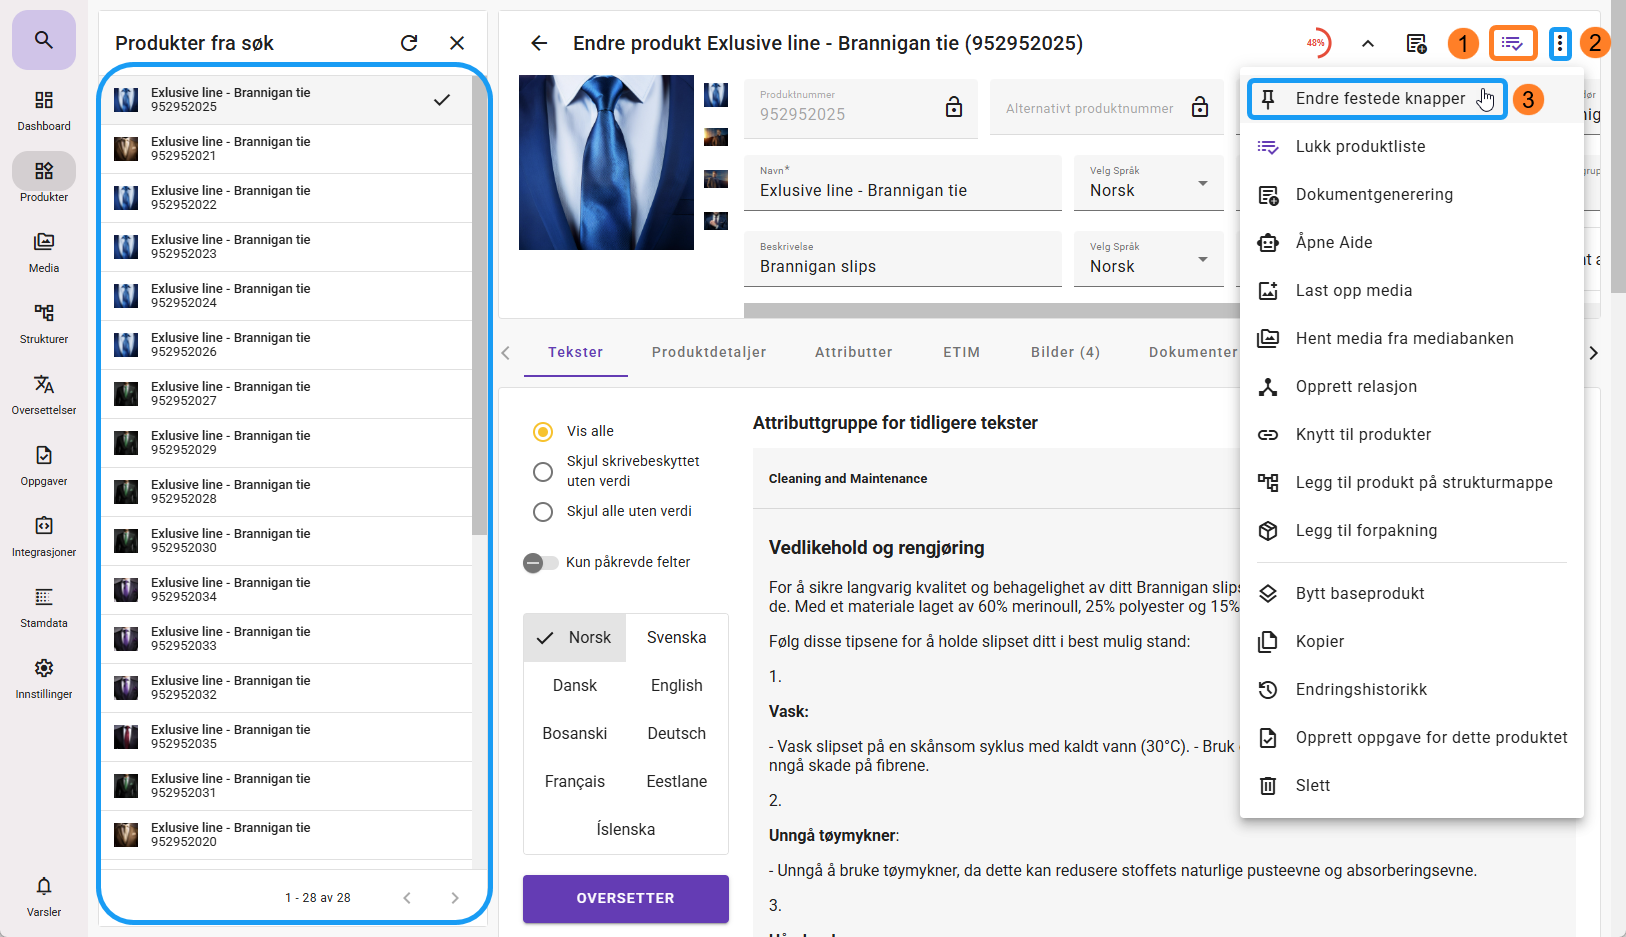
A useful tool here is the product list icon (1) as a pinned button, allowing you to see the product search results as a list on the left side and go through products one by one.
If it is not visible, click the context menu (2) and select “Edit pinned buttons” (3) to add it as a visible pinned icon.